

Although you would believe the last area to ventilate is your attic, but it’s extremely crucial. These fans can be a good source to keep your attic cool during summer. But mostly we are unsure about can we install an attic fan by ourselves or not? Does it cost too much? In this article we will guide you through an easy step-wise guide of solar attic fan installation. So, read further.
Solar Attic Fan Installation – Methods and Steps Explained
Attic fans decrease humidity, lower home temperature, reduce air conditioner load, and improve comfort. The solar attic fan has a unique design that ensures it only operates when necessary, utilizing both direct and indirect sunlight to power its functionality.
Can I Install a Solar Attic Fan Myself?
Yes, you can do it as a DIY project. It is easy to install solar attic fans for professionals and homeowners due to the streamlined process. There are 2 primary kinds of installation methods. The procedures are unique to each of them and should not be used interchangeably.
- Roof Installed – This method is as simple as drilling a small opening between two rafters on the roof and inserting the fan into the hole.
- Wall mounted on gable – In this method, first install the panels on the roof, then place the fan in a hole made in the gable, and finally connect both.
Here is a list of the several heavy-duty tools that you will need.
- A Large Piece of Cardboard and Solar Attic Fan
- Caulk gun, Roof Caulk or Sealant
- Drill/driver, Utility knife, Reciprocating Saw, and Stud Finder
- Flat pry bar, Measuring Tape, and Pencil or Marker
- Hammer, Screws and nails
- Wire Strip Pliers and Safety Goggles
Roof Mounted Solar Attic Fan Installation
To properly install a solar attic fan on roof, you can follow these steps:
Step 1: Select the installation area, ensuring it is within 24 inches from the roof’s ridge. Use a stud finder or tape measure to accurately locate the midpoint between the rafters.
Step 2: Position a screw or nail precisely at the center point.
Step 3: Take a sizable piece of cardboard and place the solar attic fan on it. Trace the outline of the base of the unit onto the cardboard.
Step 4: Align the middle of the marked circle with the screw or nail on the rooftop, then carefully transfer the pattern from the cardboard onto the roof tiles.
Step 5: Create a hole for the reciprocating saw and utilize the saw to make a precise cut along the designated line. Take caution to not cut too profoundly in order to prevent puncturing the ceiling of your attic. Eliminate the template from the roof and elevate the adjacent shingles gently using a prybar to ensure a proper fit for the fan’s base.
Step 6: To make sure no nails are left, trim the rest of the roof sheathing. Create a notch in the roofing paper that is large enough to accommodate the fan.
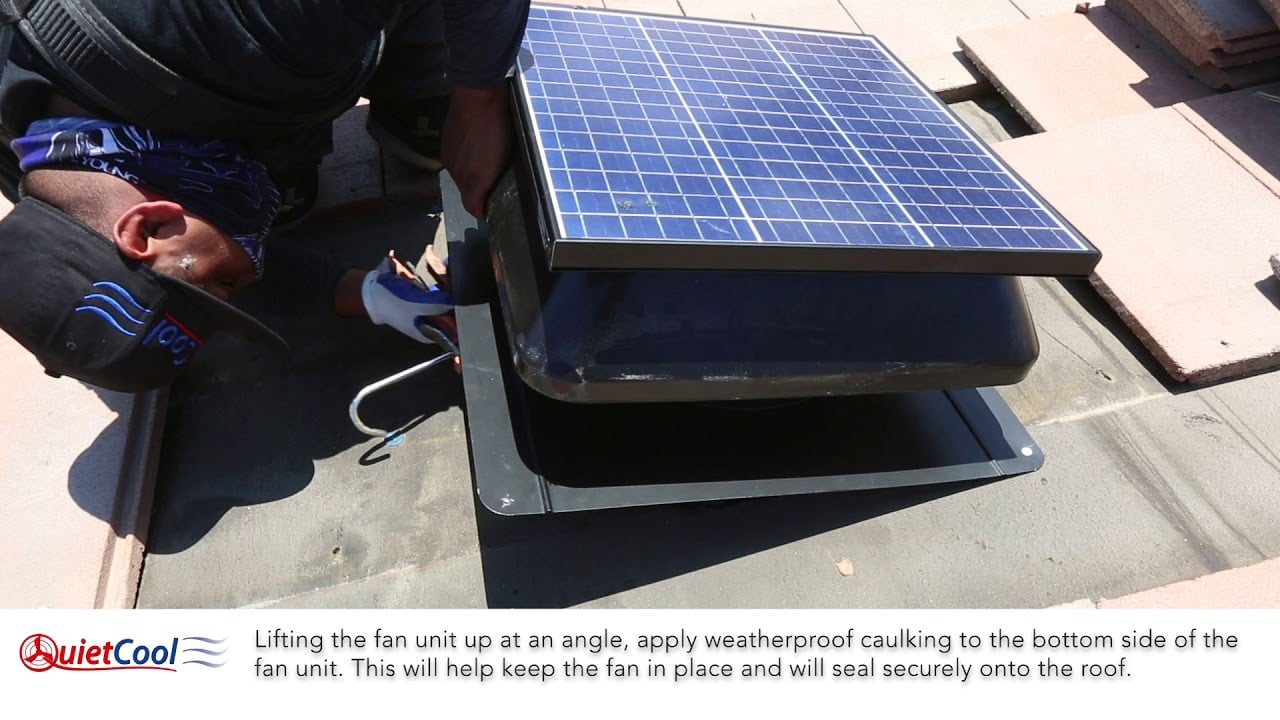
Step 7: Place the fan’s base under the roofing felt to ensure a proper fit. Apply roofing sealant to the base’s bottom and outer edge to effectively keep water out once the fan is in place.
Step 8: Ensure proper installation of the solar attic fan by positioning it below the roofing tiles, precisely between the roofing paper and sheathing. Take care to align the fan with the roof to ensure a seamless integration.
Step 9: Use screws to secure the flashing around the sides and apply caulk generously around the unit, screws, and the area where the fan meets the shingles. This particular approach will effectively safeguard against the moisture.
Gable-Mounted Solar Attic Fans Installation
Steps to install a gable-mounted solar attic fan are as follows:

Step 1: Check your roof’s inclination before you begin the process. Find the slopes of your south-facing roof. This location is accurate for maximum sunlight exposure.
Step 2: Select a spot for the gable fan installation. Mount the fan between the studs in the gable region.. The fan unit should fully enclose the gable opening in order to provide adequate ventilation.
Step 3: If the gable gap is larger than the fan unit shroud, then close the excess aperture.
Step 4: Use the wire-strip pliers to dismantle the cables, and then link them to the junction box of the solar panel.
Also See: How to Use a Solar Panel to Power a Fan
Step 5: After securing the display panel in the mount, discover the ceiling rafters in the roof structure using a tool such as a hammer or a screw finder.
Step 6: With the pencil, indicate where the rafters will be, then set the mounts on top of the marks. Do this before you drill and attach mount bracket to the rafters. Then add the butyl sealant underneath.
Step 7: Pass the wire through the fan unit up onto the roof by passing through the gable vent and exterior of the house.
Step 8: To set up the fan, pick a location in the gable. After that, make a fan bracing by measuring and cutting. Drill and insert the bracing into the gable hole after cutting it out.
Step 9: Using a wood pin, fasten the fan to the bracing and the nearby gable region.
Step 10: Remove the wire that was inserted in the gable vent. Then, make sure you appropriately link them to the fan. Cutting the connections will cause the fan to pull hot air into the attic instead of pushing it out.
Step 11: To stop water insight, cover any wire connections that are outside the attic area with electrical tape. Using a cable stapler to fasten any exposed wires.
Step 12: Set up the temperature control device or thermostat. Place a plastic copper box close to the fan to do this. Insert the cable into the box from the panel after that.
Now you know two different methods of solar attic fan installation, so here is a list of 16 Best Solar Attic Fans if you are planning to install one. But before that, read the next heading because there are some crucial points ahead that you should.
Cross-Reference: How to Install Solar Attic Fan?
Things You Should Know Before You Install a Solar Attic Fan
Well, after understanding how to install a solar attic fan by yourself, have a look at the following things that you must keep in mind.
1. Carefully Select Installation Site: Proper placement of solar attic fans maximizes efficiency by considering solar orientation and airflow for optimal ventilation. Using a soffit vent with a solar attic fan improves ventilation. If manual positioning while installation is not possible, you can choose a fan with tilt-able panels for better solar attic fan positioning.
2. Prioritize An Intake Vent: To ensure the proper circulation of cold air into the attic, first install intake vents. They will provide the necessary pathway for cold air to enter, allowing for optimal functioning of solar attic fans. Without these, avoid proceeding with the installation.
3. Check for Exterior Attic Leaks: Seal off the attic from the living space and check for external leaks. You may need to install more fans if there are any openings.
4. Earth Your Solar Attic Fan: The solar attic fan includes metal components capable of conducting external power. We mostly install them on or near roof thus there is a possibility of fan damage, in case of thunder and lighting. Thus, check the fan have an earthing or grounding wire and connect it properly to prevent this.
How Long Does it Take to Install a Solar Attic Fan?
It can take up to 2 hours for a professional to complete the installation. However, if you choose to do it yourself without any experience, it’s likely to take even longer.
How Much Does it Cost to Install a Solar Attic Fan?

When it comes to installation, the cost typically ranges between $300 and $1,000, depending on various factors. While urban areas might have higher installation costs due to the complexity of the process, rural locations could also experience similar expenses.
If you are living in a region with medium to low sunlight exposure, you have to hire the installer from nearby city. This is going to cost you a bit more. Mostly, this cost is specified by vendors in the area.
Now after reading this article, we hope you will not have any problem in Solar attic fan installation. Even though the process is easy, we still recommend taking professional assistance. Stay safe and visit our dedicated solar section for more informational content!
Recommended: How to Install Flexible Solar Panels on Tesla


